Tuesday 27 December 2016

stick man animation collab

I participated in a collab hosted by a member from hyun's dojo, the collaboration was called "Comeback collab 4".  The purpose of the animation is to create two stick figures who attack each other, but the concept is that the grey stick figure is not as strong as the blue stick figure. leading in a fight that allows us to show of our ability of animating the blue stick figure to take down the grey stick figure brutely. I decided to collaborate with a online friend on this animation.

The animation was done on macromedia flash pro 8 as both my friend and I are used to the program, you can tell who animated each stick figure from the movement. My friend animated a solid reaction sequence of this grey stick figure fighting against the blue stick figure I was animating and his version of this blue stick figure (he animated the clone that came out of the first blue stick figure)

I learnt many techniques to animating with my friend, such as positioning of the stick figure to continue the fight, by this I mean making it easy for my friend to continue the movement of his stick figure and the grey stick figure when I make pose my character, the reason for this is because we are animating straight ahead instead of creating key frames as it flows better from both our experience as you will see in the example below. We only had 3 days to the deadline but with good communication and understanding of the animation, we both managed to complete the animation together. I'm surprised we got it done on time, we submitted the animation to the host of the collaboration and got accepted and will appear in the final video.

Communication was definitely a key in making this animation, as mentioned above we could have not been able to choreograph the whole fight sequence if we didn't talk to each other, I'd like to hopefully get involved with collaborating with others in the future, trying to enter competitions. I have the ability of giving a clear understanding of what I want when animating, and being able to get ideas across is essential as it is important for the animators involved to know what they could do.
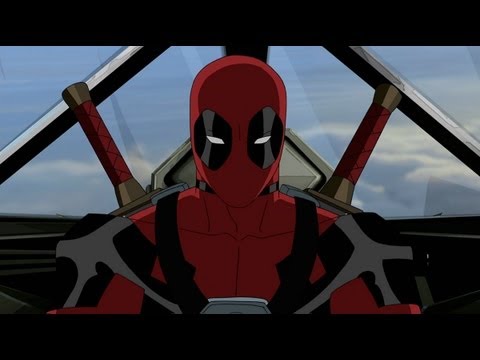
Here is the final result:


and here's the full collab, our part is 6:13 into the video


Art board:


Friday 9 December 2016

study task 5 maya Expressions

moom was a fun 3D model to play with and i found him very exaggerated when posing him, i researched how animators went about posing their characters in 3D and each animator just recorded them selves doing certain poses, whereas for this study task we took pictures of ourselves to pose moom in.

It was fairly easy and i had no problem in the process of posing him, here are the results of the poses i picked, which were pain, pride, confusion, hunger, shame. i think that it turned out pretty well and resembles what i want to show but more exaggerated.


I am confident in posing moom and will be ready to pose other characters when i animate in 3D hopefully. 

weekly 10

shot 4 animating got finished

As this is the last week i have decided to get as much done as possible throughout this week because im a bit behind on my animation project, I manged to get shot 4 finished with the bus coming into the scene within the composition on after effects and timed it accordingly with easy ease key frames to receive a nice pull up of the bus coming toward the viewer.

I then moved on to my next few shots which reuse the background i had, and from this i continued to animate my character and made sure that the character starts to show that she is getting angry progressively, from a shocked face onto getting angry that she missed 2 buses.

here are some screen shots of the progressive expression;


I pretty much reused all the assets that i had made and continued to just change a few bits mostly the girls face because there was no need to animate her again and again, and from this i was able to get a lot done.

Every asset was pretty much done by half of the week and this left me with just animating her face, i was kind of annoyed that i didn't get to the scenes i planned at the end because of not planning my time wisely. but im glad that i was able to get to 30 seconds of animated content and its seems clear enough as to what is happening.

I didnt get to finish the 3 scenes after 30 seconds and continued to place my after effects final composition on to premier where i placed the recorded sounds i collected last week and placed it appropriately to sync with the sequence i created, and i am happy with the turn out.

heres a link to download the video

Thursday 8 December 2016

weekly 9

editing phone sequence after effects
This week i started with editing the different assets i made for shot 3, the assets for this scene included phone held in hand, screen and background. i started with the phone held in hand because its very easy to do which was to make a simple comp for the image sequence, after that i moved on to the screen which i had a clear idea as to what i need to do to make it work with the phone held in hand. I began with making a separate comp because there were a few more assets that had to be placed in the scene,

here is the quick flat view of the final screen result which i then need to place on to the image sequence of the phone being held in the hand:


From last week i got advice as to what i needed to do in order to place the screen onto the phone which was to make the screen 3D so that it could move around in a 3D space which allowed me to give the screen perspective which you can see from this screen shot.

All i had to do was scale it to fit the phone and key frame it so it would move with the phone. this completes shot 3,

I forgot to mention that i gather audio from last week and this week, the recordings are from my local bus stop. I recorded a few types of sound that i thought were needed for my animation, the sound of he atmosphere around the bus stop is very important because it will be playing throughout the animation and many other sounds.

Going through the story board I could see that each shot added up to 36 seconds of animation, which is over the general amount needed for this project but the 6 seconds are important to convey the narrative I am telling and to give the comedic effects I hope to achieve.

Here's the storyboard with the timings


On Tuesday we had a group crit and we're spliced up into groups associated with what format of animation we were using which for my group was 2D digital animation, from showcasing what I had done so far in the project the group gave some advice but the most important advice was to keep at it and to finish the animation which I'm glad I had the chance to discuss about, we also talked about the sound I collected and what I could do to make it better by getting proper recording equipment and going out to a bus stop to record my sound which I'm considering.

Went back to shot 1 and finished the background so i could use it again for shot 4 because i needed to reuse the same background and continued to animate each shot, i then moved on to the bus assests and used reference of the leeds bus to create these three bus assets, front, back and side here are the assets:


Shot 2 was not done so i went back and realized that the hair was going to take time because hair movement is difficult to emulate and did take some time to do but i manged to get it done and should be ready to finish all my backgrounds next week and hopefully all the animation since ill be reusing my assets on after effects.

potentials & limitations 5

straight ahead vs key frame animation 2D animation

Both ways of animating have its potentials and limitations, which result in interesting animations,

This is all dependent on the animator themselves but you can achieve so many effects with both methods, straight ahead is a method which allows the animator create an animation from frame 1 and continue animating without using key frames. and there are potentials which can lead to making a natural sequence or either making a interesting scene that is not as accurate or proportionate. which many stick animations showcase because most of the animators animate straight ahead, heres an example of a straight ahead animation that feel natural and works:


this is really fluid and works really well and you can feel each hit from the sound effect added, most of the time its unplanned and this allows the animator to do many sequences that are not restricted by rules and storyboards.

Whereas with key frames you are limited by the fact that you cant make different movements unless you have animated in a way that there are key frames to reach and the animator can make some interesting in-between but this does not give much freedom to the animator because they are keeping to the key frames they have made, the potential of this is that the animation keeps proportion and works smoothly because you can add more in-between's where there needs to be, Many animations use the key to key frame method as it is helpful in directing the animator for timing and keeping everything consistent. here is an example of a key frame sequence.

click here   

As you can see the characters move specifically to each key frame, for example one of the girls was animated to do an anticipation movement sequence which was all key framed before adding the in-betweener's this is because it is a hard sequence to animate if it was a straight ahead sequence, and with key frames its easier to time the sequence which straight ahead cant do but can make sequences look interesting.

potential & limitations 4

The amount of time taken to create an animation in 2D digital animation
Bot digital and traditional 2D animation takes time like I have mentioned in my previous blogs but I have yet to explain as to why and why, in many cases it's up to the animators skills and experience to be able to produce animations quickly and efficiently but this takes years of practicing, most of the time.

Planning a animation project is very difficult and mm asking sure to get things done from your plan can never be 100% certain because many problems can occur which slows down the process and ends up leading to not having enough time to complete something, one example is from studio Gibhli on the production of Spirited Away,  they were behind on schedule and this lead them to work over time which you can see in the video below :


As you can see many artist stayed back late at night with the director Miyazaki to finish of as much as possible and the turn out was great but very stressful because of the time they had to make the animation.

With the amount of time to make animations freely without the limitation of having a deadline, you can produce and experiment making good or even better animation.  Like I've mentioned before on a previous blog simple animations are less time consuming but could sometimes take long to get a better results, without having so many details you can make some great animations such as hyuns stick figure spotlight animation series.


From this you can see that even with little detail you can produce such amazing animations and it's not limited by much because you can do a lot if you don't have a deadline or rather have a long time to finish an animation.

This can also been done on more complicated character with time you can produce some advance sequences, in some anime we find some fantastic animations which is called sakuga, this is where some parts of the animation looks amazing and improved. Here's an example.

Click here for example

All animation takes time and needs time to experiment and learn to make.

Potentials & limitations 3

simple 2d animations vs detailed 2d animations

Animated cartoons have many various styles these days that showcases either simple drawings or really detailed drawings, this either tells you that the character is done by professional animators such as characters like deadpool:

Image result for ultimate spider man deadpool
which takes a lot of time to create because of the amount of detail that has been put in to the character and needs someone who has had a lot of experience to animate such a detailed character whereas simple 2D characters such as Finn and Jake:
Image result for finn and jake
would not take to long to create because they are simply made out of simple shapes making the animation process less time consuming and allows the animator to get more done.

Both simple and detailed animations have their potentials and limitations, for example with dead pool he will always need to stay consistent throughout the scenes hes animated and that could limit the amount of squash and stretch the character can do, which also has the potential of looking good having the extra details makes the visuals look interesting, making the character look serious and human like.

On the other hand simple animations have their potentials of making the character squash and stretch because the characters are simple and would not take too long when animating them, for example Jake the dog can shape shift and this can help visually understand that anything is possible to do with Jake. As it is simple, there are limitations as to the movement that happens to the characters on the show,  but this is not as limited as it is with detailed drawings it all depends on the animators who are animating such sequences with their experience.

Wednesday 7 December 2016

potentials & limitations 2

2D animation (digital) vs 3D animation

Both use different techniques to animate something, With 2D animation their are a few techniques used to achieve your final out come which is mostly based on drawing out or producing shapes that tween whereas the techniques are very different when creating a 3D animation you have to undergo a lot of making 3D objects and rigging characters you have made and then move on to animating the character by moving the rig body parts in a 3D space.

Image result for 2D animation
Image result for 3D animation


2D animation does is not as time consuming as 3D in terms of making, this is because the 2D format does not need to go through the process of creating a character with a character rig which is a long process and mainly the longest part of creating a 3D animation, whereas with 2D animation you can quickly sketch out a character and use it for reference when animating in 2D and allows for the animator to get more done within the time it takes to create a 3D character.

Although one potential for 3D animation is that once all the assets such as the character and their environments are made, you can quickly animate the character in the scene and have the ability to move the camera which is quite difficult to do using 2D animation and would be a limitation to the 2D animator to create, only if they did not have the artistic knowledge as to perspective which is still hard to do. And with the ability of having made assets you can reuse them in many scenes which a hand drawn (digital) 2D animation cant really make.

Another potential would be the ability keeping the proportion of the character consistent which is no problem for the already made 3D model whereas with 2D (digital) drawn animation keeping something consistent needs a lot of skill because its been drawn, Although when animating a stretch and squash sequence 2D animation have the ability to have fun with it resulting in a funny motion, This can also be achieved with 3D animation but this takes a while and would be all done in the rigging proces, but if the rig is not done well or correctly it would make it very complicated to animate the stretch and squash, it comes down to animators preference as to what is easier to animate with.

here is a link showcasing the process that 3D animators go through to make a character with a rig, it varies on different programs but it is a similar process and that it takes a while to create where as 2D characters can be a really quick simple process from drawing.

http://www.creativebloq.com/3dw/Georges


Friday 2 December 2016

Potential & Limitations 1

2D traditional vs 2D digital

My chosen medium is digital 2D animation and there are limitations and potentials from using this medium but comparing it to traditional 2D animation there is a lot of work that can be cut off by simply using digital software.

One or rather many limitations of doing traditional 2D animation is that you have to have the equipment for the process such as a light box which is often needed to create animations which helps with seeing the frame before and after so that you can create an in-between and can be sometimes difficult to see frames. With the development of digital animation we can easily adjust the amount of frames we'd like to see and be able to lower the opacity to suit us and with programs such as flash or Clip Studio Paint we can change the colour of the onion skin which is very helpful in identifying the frames behind or in-front to help with making in-between's. and there are many things that the digital format has made to make the animating process easier and less time consuming.

Although one potential of doing it traditionally is having the physical format which is good if the digital format fails because you still have the physical document of frames that have been drawn out but one problem which is resolved by having photocopies of the frames is that you need to look after the frames because they can easily get ruined if not put in folders. This is also sustainable where as if digital crashes you cant really get anything back which is a limitation for digital animators but rarely occurs if you auto save and keep the drive from getting full.

There are many more examples that can showcase the potentials and limitations of both traditional and digital 2D animations but that's up to the artists preference for animating.

here are links to justify the importance of equipment needed for traditional animation:
 http://animation-studio-stuff.blogspot.co.uk/2009/05/purchasing-animation-desk-or-lightbox.html

and here is a link to showcase the differences and how its easier and not as time consuming when animating digitally:
http://animation.about.com/od/faqs/f/faq_companim.htm